说明 本文介绍如何自行打包编译 Headscale 源码,以及在编译源码的过程中可能出现的问题以及解决方法。
操作系统: Windows 11 家庭中文版;WSL 2 Ubuntu24.04 LTS 系统。 本次编译源码使用了 wsl 2安装的 Ubutnu 24系统。
源码目录: C:\Users\XXX\Documents\develop\0me\headscale 。 源码放在 Winodws系统中。
源码下载: https://github.com/juanfont/headscale
程序版本: v0.26.1
环境准备 代码下载 推荐使用 git 下载,而不是 下载 压缩包的源码。我使用压缩包的源码进行编译的时候会出现很多错误,最后是通过go build -o headscale ./cmd/headscale 编译了一个可执行文件,但是无法通过 make build 编译。
使用下面的命令下载源码:
1
2
3
4
git clone https://github.com/juanfont/headscale.git git checkout -b release-v0.26.1 v0.26.1
然后复制根目录下的 config-example.yaml 重命名为 config.yaml。
WSL 开启 WSL,并且安装 Ubuntu系统。
在当前计算机用户目录下,比如 C:\Users\XXX ,创建一个 .wslconfig 的文件,里面填入:
1
2
3
4
5
6
7
8
9
[wsl2] nestedVirtualization=true ipv6=true [experimental] autoMemoryReclaim=gradual # gradual | dropcache | disabled networkingMode=mirrored dnsTunneling=true firewall=true autoProxy=true
然后重启 wsl,这样 Ubuntu 系统就可以使用你本机的VPN网络了。 因为编译时需要下载一堆东西,没有外网VPN无法下载成功。
Nix安装 使用 root 账号安装 nix 的 Multi-user 版本。
1 sh <(curl --proto '=https' --tlsv1.2 -L https://nixos.org/nix/install) --daemon
参考链接:https://nixos.org/download/
编译 编译时请从 root 账号切换到普通账号。
1 2 3 4 5 6 7 8 9 10 11 12 13 14 15 16 17 cd /mnt/c/Users/XXX/Documents/develop/0me/headscalenix develop make generate make test make build ls -la result/cd ./result/bin./headscale version
环境准备需要挺久,耐心等待。
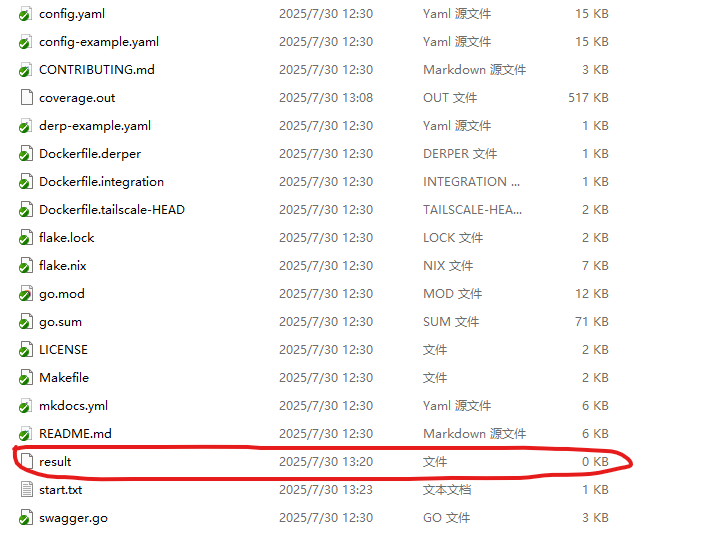
当 make build 执行成功后,目录中会出现一个 result 目录(在windows系统中查看就是一个 0kb 大小的文件,实际在linux中是一个目录。
运行 在开发机器上编译的 headscale 文件可直接运行,下面介绍将 headscale 文件复制到其它服务器上运行。
运行服务器: Ubuntu 22.04 Server
1 2 3 4 5 6 7 8 9 10 ubuntu@VM-16-7-ubuntu:~/doc/headscale$ ldd headscale linux-vdso.so.1 (0x00007ffc991a1000) libresolv.so.2 => /lib/x86_64-linux-gnu/libresolv.so.2 (0x000079e2a91e5000) libpthread.so.0 => /lib/x86_64-linux-gnu/libpthread.so.0 (0x000079e2a91e0000) libc.so.6 => /lib/x86_64-linux-gnu/libc.so.6 (0x000079e2a8e00000) /nix/store/vbrdc5wgzn0w1zdp10xd2favkjn5fk7y-glibc-2.40-66/lib/ld-linux-x86-64.so.2 => /lib64/ld-linux-x86-64.so.2 (0x000079e2a9201000) ubuntu@VM-16-7-ubuntu:~/doc/headscale$ file headscale headscale: ELF 64-bit LSB executable, x86-64, version 1 (SYSV), dynamically linked, interpreter /nix/store/vbrdc5wgzn0w1zdp10xd2favkjn5fk7y-glibc-2.40-66/lib/ld-linux-x86-64.so.2, stripped ubuntu@VM-16-7-ubuntu:~/doc/headscale$
从上面控制台输出我们可以发现,headscale 运行时需要 /nix/store/vbrdc5wgzn0w1zdp10xd2favkjn5fk7y-glibc-2.40-66/lib/ld-linux-x86-64.so.2 ,该文件其实是链接的 /lib64/ld-linux-x86-64.so.2 ,要想 程序正常运行,需要手动创建 /nix/store/vbrdc5wgzn0w1zdp10xd2favkjn5fk7y-glibc-2.40-66/lib/ 目录,并且将 ld-linux-x86-64.so.2 文件复制到刚创建的文件夹中。
此外,需要 config.yaml 文件,以及创建 /root/.headscale/ 、 /varlib/headscale/ 并且需要给这些目录赋予权限。
1 2 3 4 5 6 7 8 9 10 11 12 ubuntu@VM-16-7-ubuntu:~/doc/headscale$ sudo ./headscale serve 2025-08-05T17:20:01+08:00 INF Opening database database=sqlite3 path=/var/lib/headscale/db.sqlite 2025-08-05T17:20:01+08:00 INF Using policy manager version: 2 2025-08-05T17:20:01+08:00 INF Starting Headscale commit=6b6daf389bd11624c4036de525740a0568d5f72f-dirty version=6b6daf3-dirty 2025-08-05T17:20:01+08:00 INF Clients with a lower minimum version will be rejected minimum_version=v1.62.0 2025-08-05T17:20:01+08:00 INF github.com/juanfont/headscale/hscontrol/derp/server/derp_server.go:106 > DERP region: {RegionID:999 RegionCode:headscale RegionName:Headscale Embedded DERP Latitude:0 Longitude:0 Avoid:false NoMeasureNoHome:false Nodes:[0xc00051a090]} 2025-08-05T17:20:01+08:00 INF github.com/juanfont/headscale/hscontrol/derp/server/derp_server.go:107 > DERP Nodes[0]: &{Name:999 RegionID:999 HostName:124.232.181.156 CertName: IPv4:124.232.181.156 IPv6:2406:da18:d4c:c000:8d2b:1775:f73f:7c2f STUNPort:3478 STUNOnly:false DERPPort:8081 InsecureForTests:false STUNTestIP: CanPort80:false } 2025-08-05T17:20:01+08:00 INF STUN server started at [::]:3478 2025-08-05T17:20:01+08:00 INF listening and serving HTTP on: 0.0.0.0:8080 2025-08-05T17:20:01+08:00 INF listening and serving debug and metrics on: 0.0.0.0:9090
打包成镜像 如果你想将源码打包成 docker 镜像,可以参考下面的链接:
https://ownding.com/2025/08/08/headscale%E7%B3%BB%E5%88%97%EF%BC%9A%E5%A6%82%E4%BD%95%E5%B0%86%E6%BA%90%E7%A0%81%E7%BC%96%E8%AF%91%E7%9A%84headscale%E6%89%93%E5%8C%85%E6%88%90docker%E9%95%9C%E5%83%8F/
编译异常汇总 以下编译的异常情况都是我使用 压缩的源代码编译出现的。使用 git 版本的源码编译没有如下问题。
问题1 1 2 3 4 5 6 7 8 9 10 11 12 13 14 15 16 17 18 19 20 21 22 23 24 25 26 27 djc@jetron-djc:/mnt/c/Users/DJC/Documents/develop/0me/headscale-0.26.1$ make build nix build error: … while calling the 'derivationStrict' builtin at <nix/derivation-internal.nix>:37:12: 36| 37| strict = derivationStrict drvAttrs; | ^ 38| … while evaluating the derivation attribute 'name' at /nix/store/qmm7hgw60vp7vj9lma95hl329d0j3n6n-source /pkgs/stdenv/generic/make-derivation.nix:438:13: 437| // (optionalAttrs (attrs ? name || (attrs ? pname && attrs ? version)) { 438| name = | ^ 439| let (stack trace truncated; use '--show-trace' to show the full, detailed trace) error: attribute 'dirtyShortRev' missing at /nix/store/wrx2gzxp6f5sdha4kswnpn6j8sqmfbnk-source /flake.nix:15:41: 14| }: let 15| headscaleVersion = self.shortRev or self.dirtyShortRev; | ^ 16| commitHash = self.rev or self.dirtyRev; make: *** [Makefile:20: build] Error 1
编辑 flake.nix 文件,
将 headscaleVersion = self.shortRev or self.dirtyShortRev; 修改成:
1
2
3
4
5
headscaleVersion = if self ? shortRev then self.shortRev else if self ? dirtyShortRev then self.dirtyShortRev else "v0.26.1";
问题2 1 2 3 4 5 6 7 8 9 10 11 12 13 14 15 16 17 18 19 20 21 22 23 24 25 26 27 28 29 30 31 32 33 34 35 36 djc@jetron-djc:/mnt/c/Users/DJC/Documents/develop/0me/headscale-0.26.1$ make build nix build warning: Git tree '/mnt/c/Users/DJC/Documents/develop/0me/headscale-0.26.1' is dirty error: Cannot build '/nix/store/x0151wjd71c3icbvqrjrhmah4039cxrc-headscale-1d8abba-dirty.drv' . Reason: builder failed with exit code 1. Output paths: /nix/store/w1kqv2j36dsixf5pm4v5lwf2wiwkrkhz-headscale-1d8abba-dirty Last 25 log lines: > Running phase: buildPhase > Building subPackage ./cmd/headscale > buildPhase completed in 52 seconds > Running phase: checkPhase > > ---------------------------------------------------------------------- > FAIL: headscale_test.go:29: Suite.TestConfigFileLoading > > headscale_test.go:54: > c.Assert(err, check.IsNil) > ... value *fmt.wrapError = &fmt.wrapError{msg:"fatal error reading config file: open /build/headscale246087243/config.yaml: no such file or directory" , err:(*fs.PathError)(0xc0003dfcb0)} ("fatal error reading config file: open /build/headscale246087243/config.yaml: no such file or directory" ) > > > ---------------------------------------------------------------------- > FAIL: headscale_test.go:73: Suite.TestConfigLoading > > headscale_test.go:96: > c.Assert(err, check.IsNil) > ... value *fmt.wrapError = &fmt.wrapError{msg:"fatal error reading config file: Config File \"config\" Not Found in \"[/build/headscale4241716010]\"" , err:viper.ConfigFileNotFoundError{name:"config" , locations:"[/build/headscale4241716010]" }} ("fatal error reading config file: Config File \"config\" Not Found in \"[/build/headscale4241716010]\"" ) > > OOPS: 0 passed, 2 FAILED > --- FAIL: Test (0.00s) > FAIL > FAIL github.com/juanfont/headscale/cmd/headscale 0.020s > FAIL For full logs, run: nix log /nix/store/x0151wjd71c3icbvqrjrhmah4039cxrc-headscale-1d8abba-dirty.drv make: *** [Makefile:20: build] Error 1
这个错误是因为测试阶段失败导致构建中断。测试失败的原因是找不到配置文件。
直接构建二进制文件:
1
2
3
cp config-example.yaml config.yamlgo mod tidy go build -o headscale ./cmd/headscale
编译成功后,在项目目录下有个 headscale 文件,大概80多M。
问题3 1 2 root@jetron-djc:~ error: experimental Nix feature 'nix-command' is disabled; add '--extra-experimental-features nix-command' to enable it
这个错误是因为 Nix 的 nix-command 功能是实验性的,默认被禁用了。
1 2 echo 'experimental-features = nix-command flakes' >> /etc/nix/nix.conf
使用 root 用户执行上面的命令即可。
问题4 1 2 3 root@jetron-djc:~ path '/root' does not contain a 'flake.nix' , searching up error: could not find a flake.nix file
这个错误是因为 nix develop 命令需要在包含 flake.nix 文件的目录中运行,请 cd 到你项目的目录执行 nix develop。
问题5 1 2 3 4 === Failed === FAIL: hscontrol/db TestConstraints/no-duplicate-username-if-no-oidc-postgres (0.05s) db_test.go:404: start postgres: initdb: initdb: error: cannot be run as root initdb: hint: Please log in (using, e.g., "su" ) as the (unprivileged) user that will own the server process.
这个错误是因为 PostgreSQL 的 initdb 命令不能以 root 用户身份运行,这是出于安全考虑。测试代码试图以 root 用户初始化数据库,但被拒绝了。请使用普通用户 执行make build 命令。
手动安装相关依赖 1 2 3 4 5 6 go install github.com/bufbuild/buf/cmd/buf@v1.55.1 sudo apt update sudo apt install protobuf-compiler