问题
现在信创等需求越来越多,很多时候我们需要同时打包 x86 和 arm 架构的程序。
本文主要介绍 如何使用 Docker 部署的 Jenkins 自动打包 x86 和 arm 架构的镜像。
本次介绍 如何打包 Spring Boot 以及 Node 项目,包含了前后端。
环境准备
1、x86 电脑或服务器,部署了 Jenkins 服务
2、X86 电脑或服务器,部署了 Harbor 服务。 打包后,自动推送镜像到 harbor
Jenkins 安装及配置
1
2
3
4
5
6
7
8
9
10
11
12
| docker run \
-u root \
-d \
-v $(which docker):/usr/bin/docker \
-v $PWD/jenkins-data:/var/jenkins_home \
-v /var/run/docker.sock:/var/run/docker.sock \
-v /root/.docker/:/root/.docker/ \
-v /etc/localtime:/etc/localtime \
--network host \
--restart=always \
--privileged \
jenkins/jenkins
|
注意: 挂载了宿主机的 /root/.docker/ 目录。这样方便 容器内使用 buildx 。
1、 在 Github 上下载 Buildx 二进制文件
1
| wget https://github.com/docker/buildx/releases/download/v0.28.0/buildx-v0.28.0.linux-amd64
|
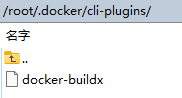
2、 移动到 /root/.docker 目录下
1
| mv buildx-v0.10.2.linux-amd64 /root/.docker/cli-plugins/docker-buildx
|
3、 添加可执行权限
1
| chmod +x /root/.docker/cli-plugins/docker-buildx
|
1
2
3
4
5
6
|
docker exec -it 容器名称 sh
docker buildx version
docker buildx ls
|

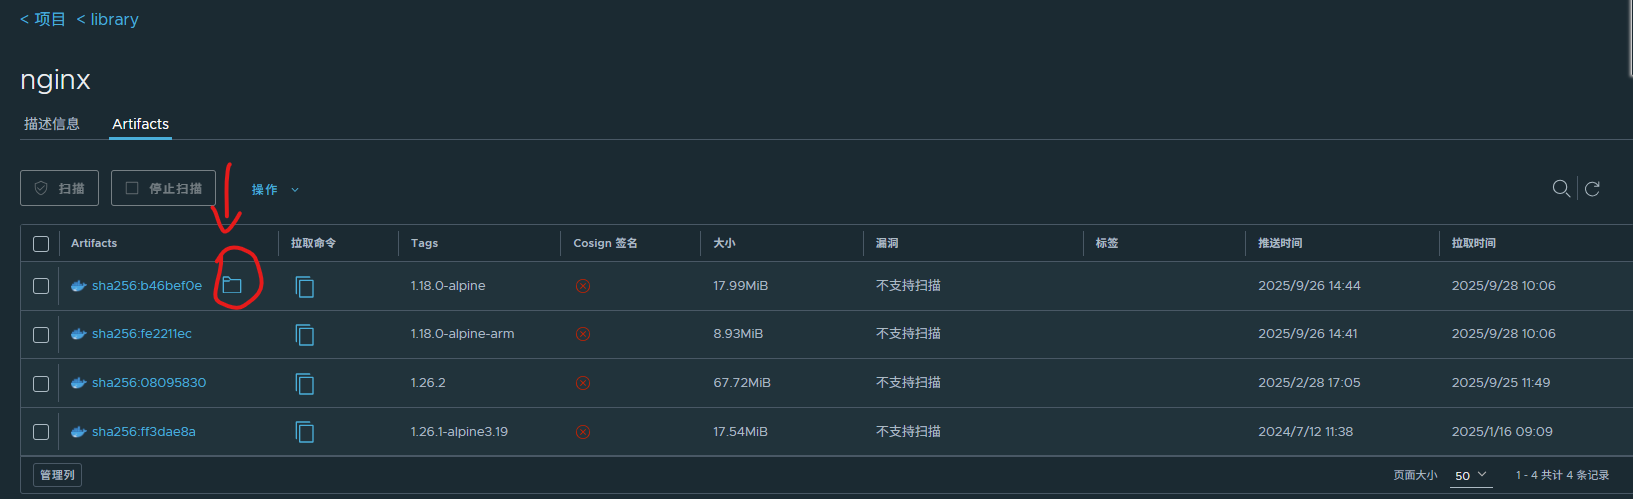
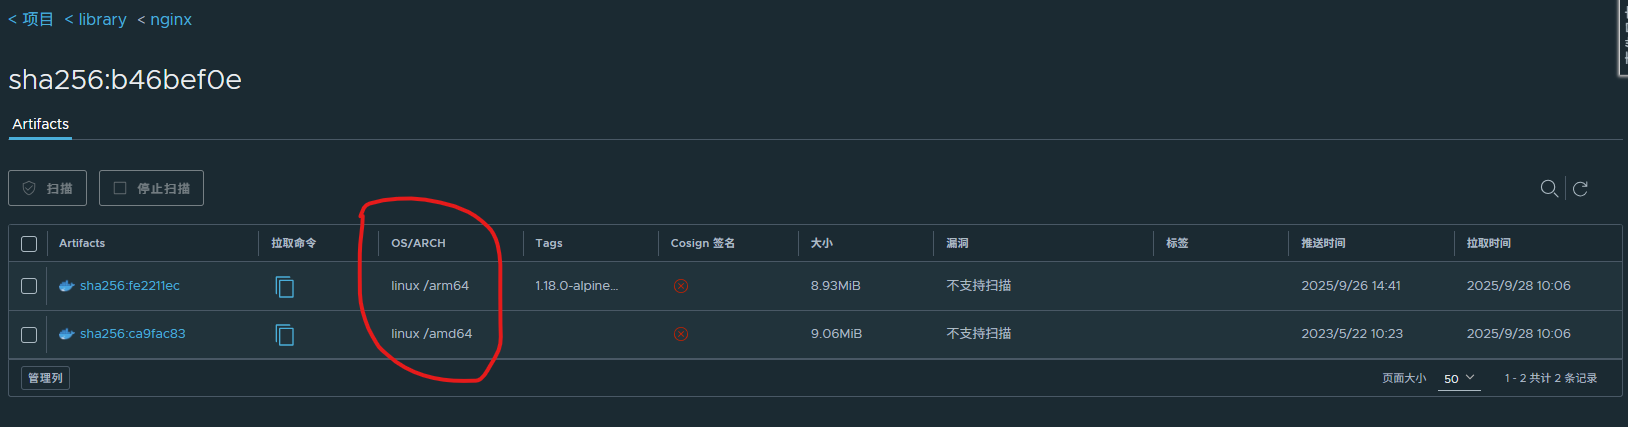
多架构基础镜像准备
如果使用 自有 Harbor 里的镜像,需要仓库里有多个架构的基础镜像。
1
2
3
4
5
6
7
8
9
10
11
12
13
14
|
docker pull registry.cn-hangzhou.aliyuncs.com/acs/alpine:3.16.0
docker tag registry.cn-hangzhou.aliyuncs.com/acs/alpine:3.16.0 harbor.xxxx.com/library/alpine:3.16.0
docker push harbor.xxxx.com/library/alpine:3.16.0
docker pull --platform=linux/arm64 registry.cn-hangzhou.aliyuncs.com/acs/alpine:3.16.0-arm64
docker tag registry.cn-hangzhou.aliyuncs.com/acs/alpine:3.16.0-arm64 harbor.xxxx.com/library/alpine:3.16.0-arm64
docker push harbor.xxxx.com/library/alpine:3.16.0-arm64
docker buildx imagetools create -t harbor.xxxx.com/library/alpine:3.16.0 harbor.xxxx.com/library/alpine:3.16.0-arm harbor.xxxx.com/library/alpine:3.16.0
|
后端打包
后端 Spring Boot 打包其实不需要 buildx,因为 Spring Boot 项目使用 jib 插件即可完成多架构镜像的打包及推送。
示例:
1
2
3
4
5
6
7
8
9
10
11
12
13
14
15
16
17
18
19
20
21
22
23
24
25
26
27
28
29
30
31
32
33
34
35
36
37
38
39
| <plugin>
<groupId>com.google.cloud.tools</groupId>
<artifactId>jib-maven-plugin</artifactId>
<version>3.4.6</version>
<configuration>
<allowInsecureRegistries>true</allowInsecureRegistries>
<from>
<image>harbor.xxxx.com/library/openjdk:8u342-jdk</image>
<platforms>
<platform>
<architecture>arm64</architecture>
<os>linux</os>
</platform>
<platform>
<architecture>amd64</architecture>
<os>linux</os>
</platform>
</platforms>
</from>
<to>
<image>harbor.xxxx.com/library/spring:${project.version}</image>
</to>
<container>
<jvmFlags>
<jvmFlag>-Xms2g</jvmFlag>
<jvmFlag>-Xmx6g</jvmFlag>
<jvmFlag>-XX:+HeapDumpOnOutOfMemoryError</jvmFlag>
<jvmFlag>-XX:HeapDumpPath=/app/logs</jvmFlag>
<jvmFlag>-Duser.timezone=Asia/Shanghai</jvmFlag>
</jvmFlags>
<ports>
<port>9988</port>
</ports>
<creationTime>USE_CURRENT_TIMESTAMP</creationTime>
<mainClass>com.xxx.xxx.XxxApplication</mainClass>
</container>
</configuration>
</plugin>
|
前端打包
前端打包需要使用到 buildx,因为 Node 项目没有类似 jib 的插件。
前端项目 jenkinsfile 代码如下:
1
2
3
4
5
6
7
8
9
10
11
12
13
14
15
16
17
18
19
20
21
22
23
24
25
26
27
28
29
30
31
32
33
34
35
36
37
38
39
40
41
42
43
44
45
46
47
48
49
50
51
52
53
54
55
56
57
58
59
60
61
62
63
64
65
66
67
68
69
70
71
72
73
74
75
76
77
78
79
80
81
82
83
84
85
86
87
88
89
90
91
92
93
94
| #!/usr/bin/env groovy
def version = '1.0.arm64'
pipeline {
agent none
environment {
RELEASE_NUMBER = "${version}.${env.BUILD_NUMBER}"
NPM_CONFIG_REGISTRY = 'http://yournexue.com/repository/npm-group/'
}
stages {
stage("install dependencies and build") {
agent {
docker {
image 'node:14.18.1'
args '-v /root/.yarn/v6:/usr/local/share/.cache/yarn/v6 --add-host=raw.githubusercontent.com:185.199.111.133 --add-host=registry.yarnpkg.com:104.16.30.34 -e NODE_OPTIONS=--max_old_space_size=8192'
}
}
steps {
sh "sed 's/VERSION-NUM/${RELEASE_NUMBER}/g' -i ./.env.production"
sh "sed 's/VERSION-NUM/${RELEASE_NUMBER}/g' -i ./.env.test"
sh "yarn config set registry ${NPM_CONFIG_REGISTRY} && yarn config set ignore-engines true && yarn install"
sh 'yarn build'
sh "rm -rf xxx-app && mkdir -p xxx-app && mv -f dist xxx-app"
sh "mv -f conf xxx-app"
sh "mv -f Dockerfile xxx-app"
}
}
stage("setup buildx (multi-arch + HTTP Harbor)") {
agent any
steps {
writeFile file: 'buildkit.toml', text: '''
[registry."harbor.xxxx.com"]
http = true
insecure = true
'''
sh '''
set -e
export DOCKER_HOST="${DOCKER_HOST:-unix:///var/run/docker.sock}"
export DOCKER_CLI_EXPERIMENTAL="${DOCKER_CLI_EXPERIMENTAL:-enabled}"
export HOME="${HOME:-/root}"
echo "[check] docker & buildx versions:"
docker version
docker buildx version
# 1) 启用 binfmt(使 x86 上可构建 arm64;幂等)
docker run --privileged --rm tonistiigi/binfmt --install all || true
# 2) 确保使用 docker-container 驱动的 builder(本 stage 内就地创建/选择,避免跨节点丢失)
BUILDER_NAME=fe-multiarch-builder
# 如已存在则直接 use,不存在则创建
if docker buildx inspect "${BUILDER_NAME}" >/dev/null 2>&1; then
docker buildx use "${BUILDER_NAME}"
else
docker buildx create \
--name "${BUILDER_NAME}" \
--driver docker-container \
--config ./buildkit.toml \
--driver-opt network=host \
--driver-opt "env.http_proxy=" \
--driver-opt "env.https_proxy=" \
--use
fi
# 3) 引导 BuildKit
docker buildx inspect --bootstrap
echo "[builders]"
docker buildx ls
# 4) 多架构构建并推送(显式指定 --builder,防止默认切回 docker driver)
echo "[buildx] building & pushing multi-arch image..."
docker buildx build xxx-app \
--builder "${BUILDER_NAME}" \
--platform linux/amd64,linux/arm64 \
-t 172.16.30.52:8894/library/app:${RELEASE_NUMBER} \
--push
'''
}
}
stage("clean") {
agent any
steps {
sh '''
# 可选择保留 builder 以复用缓存,这里演示清理
docker buildx rm fe-multiarch-builder || true
rm -rf app buildkit.toml || true
'''
}
}
}
}
|
总结
在 Jenkins 中同时打包 x86 以及 arm 架构的镜像,我们只需要在x86 架构的机器上安装 buildx 即可,不需要用到 arm 架构的机器。