Goodbye PC: The Best Solution for Using an iPad (Tablet) Exclusively for Work, Study, and Entertainment

Author: OwnDing

Date: 2022-12-20

Back in March 2022, the battery on my Microsoft Surface Laptop — which I had been using for over three years — started to swell. Official repair costs were too high since the warranty had expired, and attempting a self-repair ran into the frustrating problem of stripped screws. All of this got me thinking about replacing the laptop. But then I thought: spending 7,000–8,000 RMB on a laptop that only lasts three years, and having to lug it around every day — it just didn’t seem worth it.

That’s when I remembered the iPad Pro’s famous tagline: “Your next computer is not a computer.” On impulse, I decided not to buy a laptop at all — I would use only the iPad Pro for work, study, and entertainment.

My day-to-day computer use is mainly document writing and software development. So I searched the App Store for suitable replacement apps, but nothing was satisfactory — even editing a complex Word document was a struggle, let alone writing code. I also looked at other people’s iPad/tablet productivity setups online, but they all had drawbacks: too expensive, or too inconvenient to use.

Then, at the end of March, I happened to come across a Spring Festival promotion from Tencent Lightweight Cloud: 4 cores, 8 GB RAM, 10 Mbps bandwidth, 100 GB storage — only 998 RMB for 3 years. I immediately decided to go with an iPad + cloud PC setup, treating the cloud PC as just another app.
image
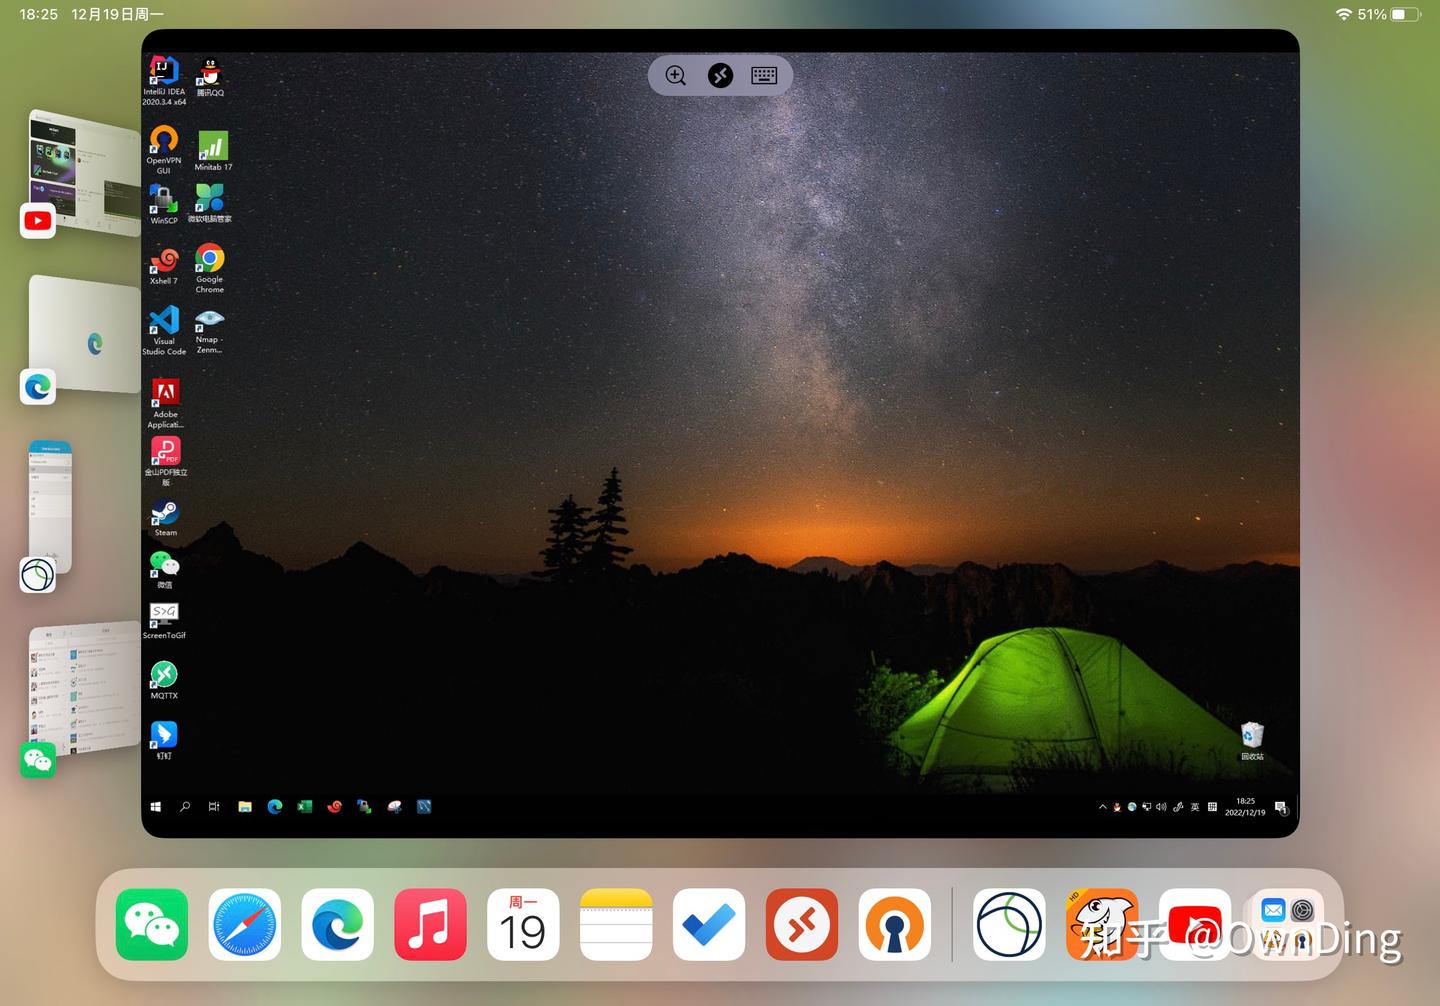
iPad Pro connecting to a cloud PC via RD Client. Although the title says “goodbye PC,” what I’m really saying goodbye to is the physical computer in my hands — a cloud PC is still needed for complex work and study tasks. After using this setup for 9 months, I found it fully meets my needs for both productivity and entertainment, and most importantly, the cost is low. Even during extended business trips (about a week), there are no issues at all, and a tablet is so much easier to carry.

Without further ado — what do you need if you want to work and study using only an iPad or tablet?

An iPad or other tablet; a Bluetooth keyboard, mouse, and docking hub + a cloud PC (choose specs based on your needs, running Windows Server 2019). Yes, with just these items you can leave your bulky computer behind while still enjoying everything a tablet has to offer.

Tablet Selection

Both iPads and Android tablets can meet the needs of productivity and study. That said, a larger screen size is recommended.

Cloud Server Selection

Choose a cloud server provider based on your preference. It is recommended to buy a lightweight cloud server during major sale events such as Double 11, Double 12, or Chinese New Year, when discounts are the largest. For example, the Tencent Cloud Lighthouse server I purchased costs only 998 RMB for 3 years (Spring Festival promotion), and the 8 GB RAM configuration is more than enough for everyday office work.

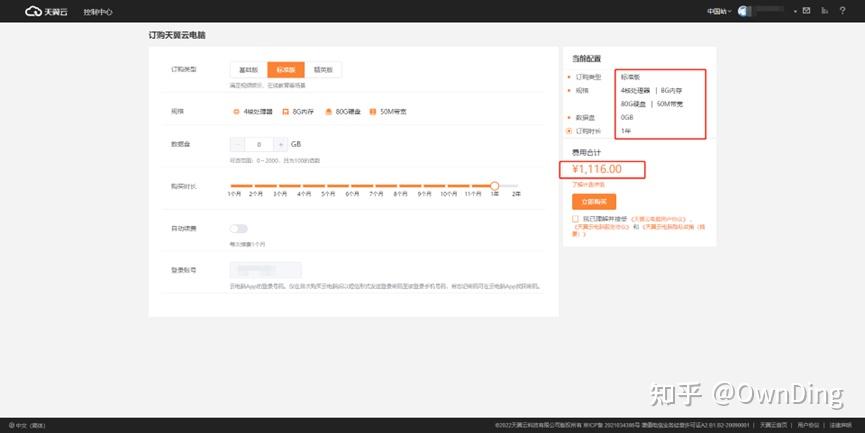
You can also choose Tianyi Cloud PC, which offers larger bandwidth and is even suitable for watching movies on the cloud:
image
Tianyi Cloud PC pricing. If you buy a tablet for around 3,000 RMB and plan to use it for 3 years, the annual tablet cost is about 1,000 RMB; if you buy a cloud PC during a promotional period, the annual cost is around 600 RMB. That makes your total 3-year spend approximately 4,800 RMB — and you end up with both a capable computer and a tablet. Sounds like a great deal, right?

Security Recommendations (Important)

When connecting an iPad or other tablet to a cloud PC via Microsoft RD Client, the remote desktop port is exposed to the public internet, which inevitably introduces security risks. The following recommendations can help harden your cloud PC:

  1. Use a strong password. Set a strong password for your cloud server.

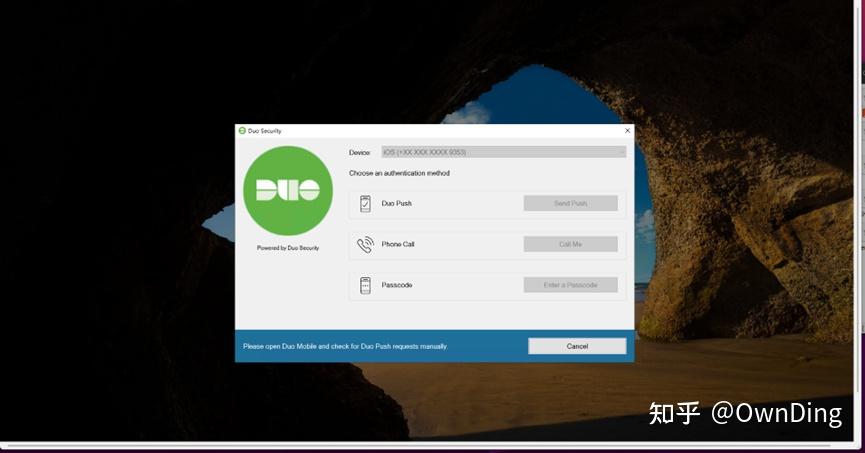
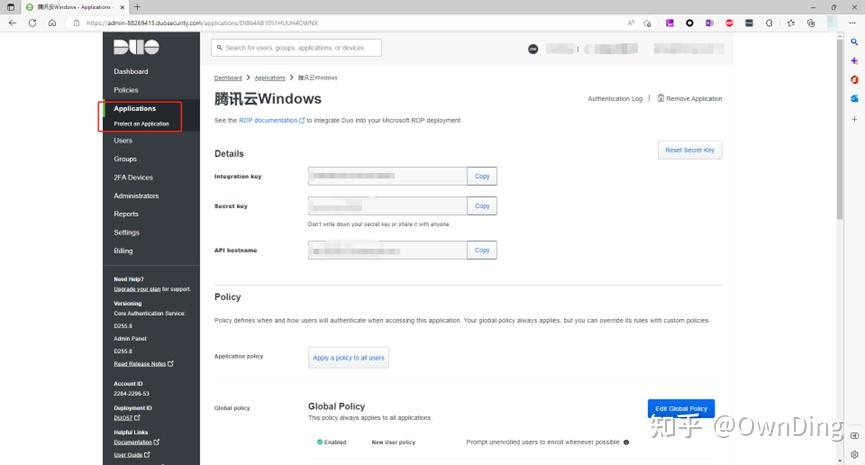
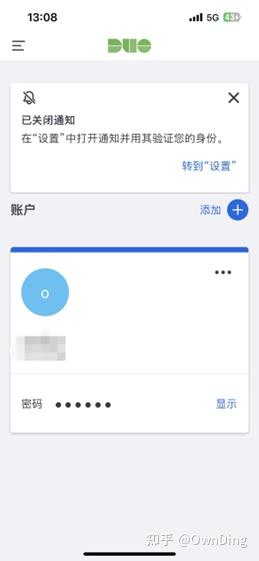
  2. Multi-factor authentication. Install the free version of Duo Security — remote login to the cloud PC will then require phone confirmation. Website: Multi-Factor Authentication & Single Sign-On
image
Phone-based second factor required at remote login.
image
Remote login authentication configured via Duo Security.
image
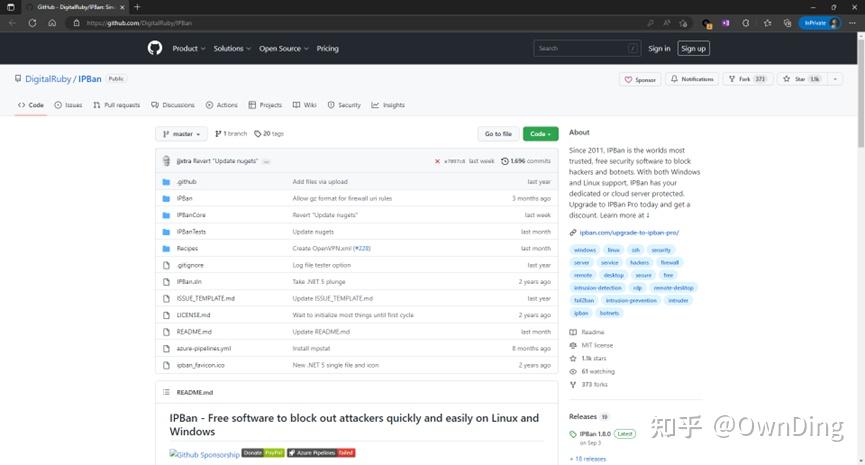
Authorizing login via the Duo mobile app. 3. Install IPBan (free). Exposing remote desktop ports to the internet makes the server vulnerable to brute-force attacks. IPBan automatically adds IP addresses with repeated failed login attempts to the firewall blocklist. Link: GitHub - DigitalRuby/IPBan: Since 2011, IPBan is the worlds most trusted, free security software to block hackers and botnets. With both Windows and Linux support, IPBan has your dedicated or cloud server protected. Upgrade to IPBan Pro today and get a discount. Learn more at ↓
image
IPBan GitHub homepage. The above three measures are foundational security recommendations. With these three in place, unauthorized logins to your cloud PC are extremely unlikely.

Other security hardening options — such as changing the remote desktop port or restricting login to specific IP addresses — are somewhat more complex for most users.

Setting Up an Online Development Environment (For Developers)

For developers or those learning to code, having your own server lets you set up an online development environment and write and debug code directly from the browser on an iPad or tablet.

  1. Frontend — Install Code-Server (free)

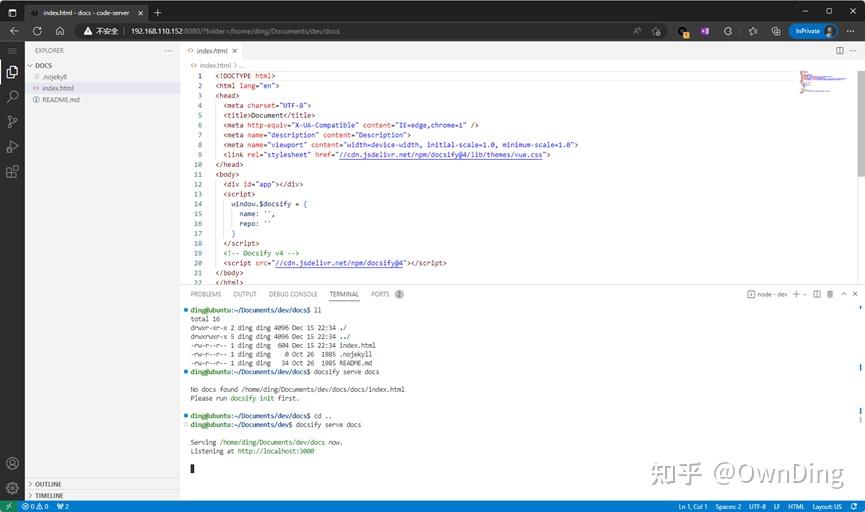
image
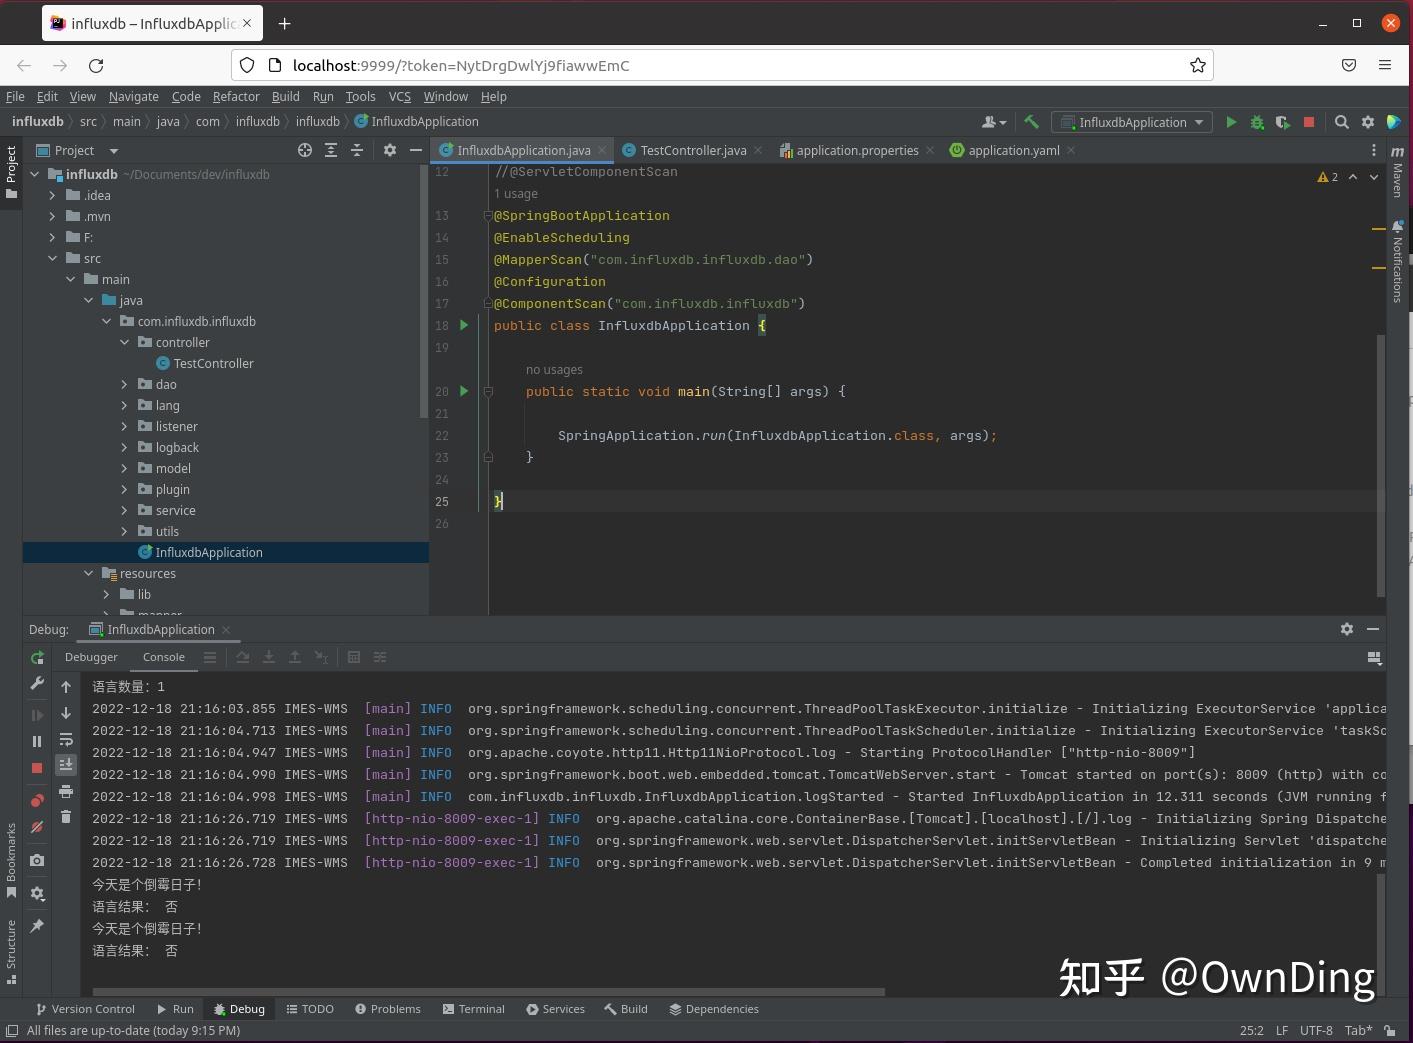
Online coding and debugging. 2. Backend — Install JetBrains Projector (free)
image
IDEA online coding and debugging. If any of these ports are exposed to the public internet, pay close attention to security. Exposing ports publicly is not recommended.

Summary

At the current stage, apps on iPads or Android tablets alone cannot meet the productivity needs of most people — but paired with a cloud PC, the story changes entirely. You can truly leave your physical computer behind and go anywhere with just a tablet, whether it’s a quick outing or a week-long business trip. In a pinch, you can also log into the cloud PC from your phone to handle urgent tasks.
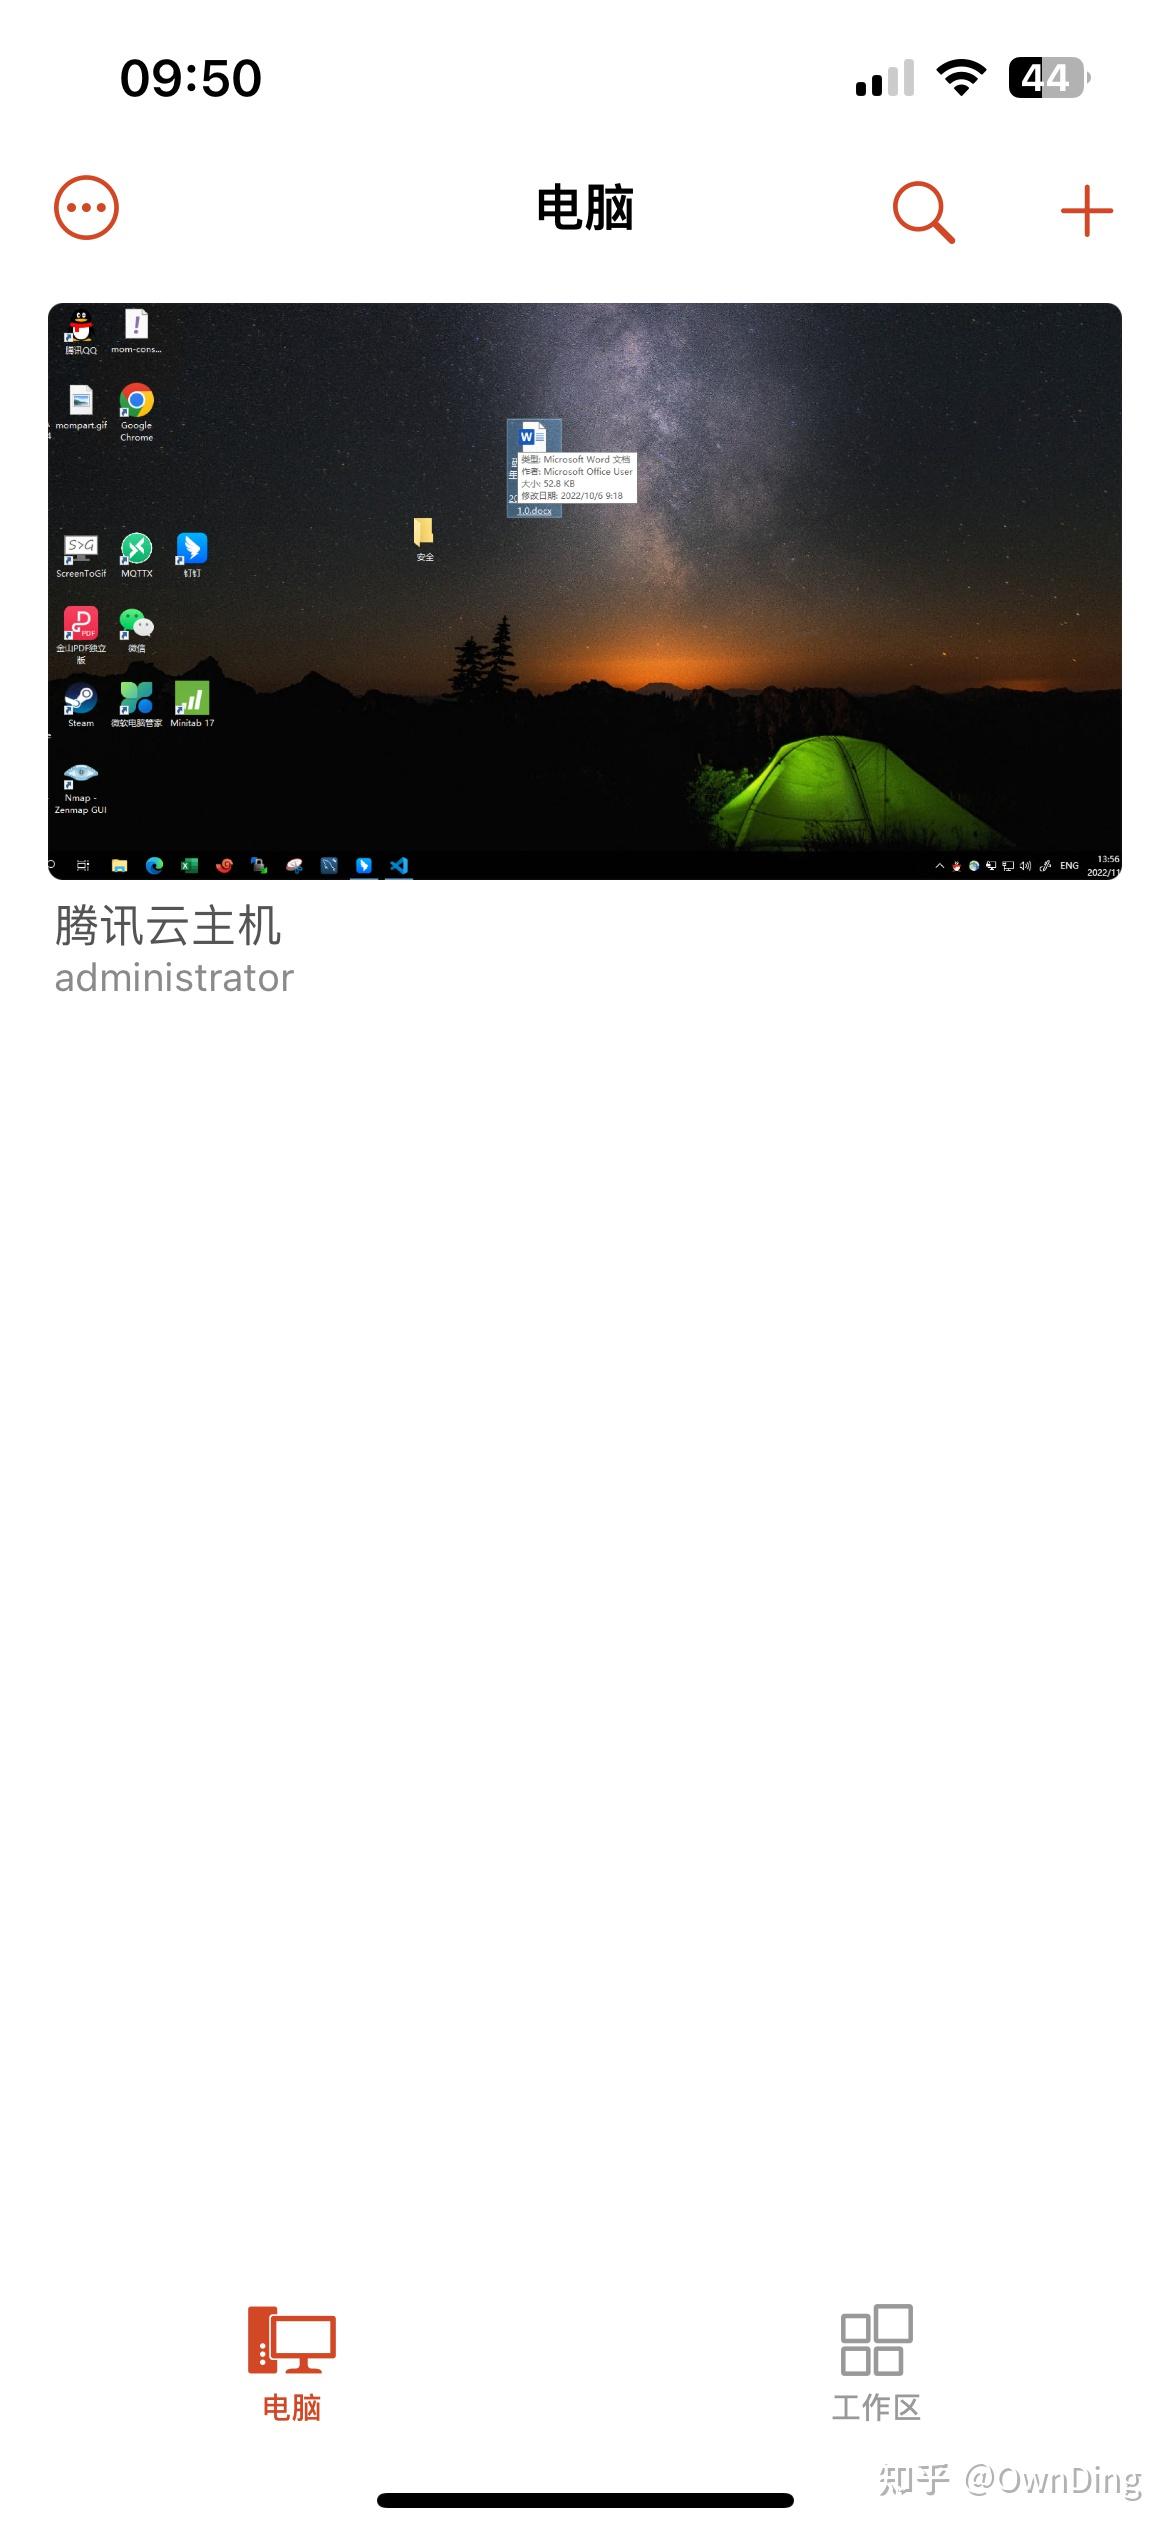
image
RD Client mobile app — for emergency use on your phone. For anyone with mobile productivity needs, this setup is simply unbeatable ;)
I previously built a lightweight GB28181 platform, but installing it required some familiarity with containers, which made the experience a bit inconvenient. So I decided to package it as a double-click-to-run application for end users. To achieve this, ZLMediaKit needs to be compiled on Windows.
This document explains how to compile ZLMediaKit on Windows 11.
During compilation following the official tutorial, I encountered several errors and found some parts of the documentation unclear. I felt it was necessary to write a supplementary guide.
Please follow the steps one by one.

1. Prerequisites

Before starting the build, make sure the following software is installed in your development environment:

  • Visual Studio: VS2022 (with the Desktop development with C++ workload installed).
  • Git: For cloning the repository.

I performed the build on Windows 11 with VS2022. You do not need to open VS2022 during the build process — only PowerShell and the x64 Native Tools Command Prompt for VS 2022 are needed.

2. Get the Source Code

Open a command-line tool (CMD or PowerShell) and run the following commands to clone the repository and initialize submodules:

1
2
3
4
5
6
7
8
# Clone the main repository
git clone https://github.com/ZLMediaKit/ZLMediaKit.git

# Enter the directory
cd ZLMediaKit

# Initialize submodules (important — the build will fail without this)
git submodule update --init --recursive

The code I compiled is from the latest master branch as of 2026/3/1.


3. Windows Build Using scoop + vcpkg

Note: The following is based on the ZLMediaKit official documentation for Windows compilation, with some modifications I made to ensure a successful build.

The following describes one way to compile ZLMediaKit using scoop + vcpkg.

  • scoop: A command-line package manager for Windows
  • vcpkg: A C++ library manager initiated by Microsoft, containing a large number of commonly used open-source libraries

Since both tools are command-line based, they integrate very well into automated workflows. Highly recommended.

⚠️ Note

  • All operations below must be performed in a PowerShell terminal unless otherwise specified.

4. Install Build Dependencies via scoop and vcpkg

4.1 Download and Install scoop, Then Install Dependency Tools

Note: Simply run the commands below directly in PowerShell. Errors are rare in this step.

The following installs the dependency tools cmake and ninja (optional but recommended). Skip this step if they are already installed.

For full details, refer to the official documentation. The following lists only the relevant brief steps:

  1. Set the SCOOP environment variable to configure the installation directory for scoop and the packages it manages:

    1
    $env:SCOOP = 'C:\work\develop\scoop'
  2. Allow PowerShell script execution for the current user:

    1
    Set-ExecutionPolicy -ExecutionPolicy RemoteSigned -Scope CurrentUser
  3. Install scoop:

    1
    iwr -useb get.scoop.sh | iex
  4. Add the extras bucket to scoop:

    1
    scoop bucket add extras
  5. Install cmake and ninja:

    1
    scoop install cmake ninja

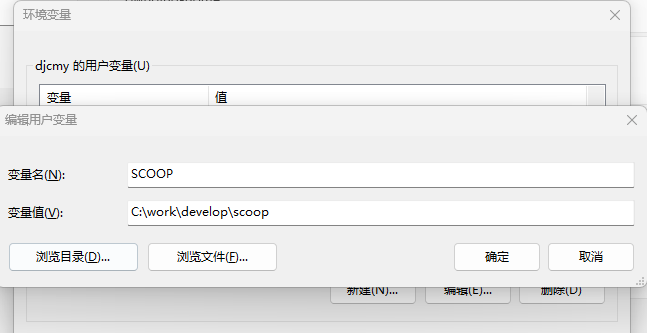
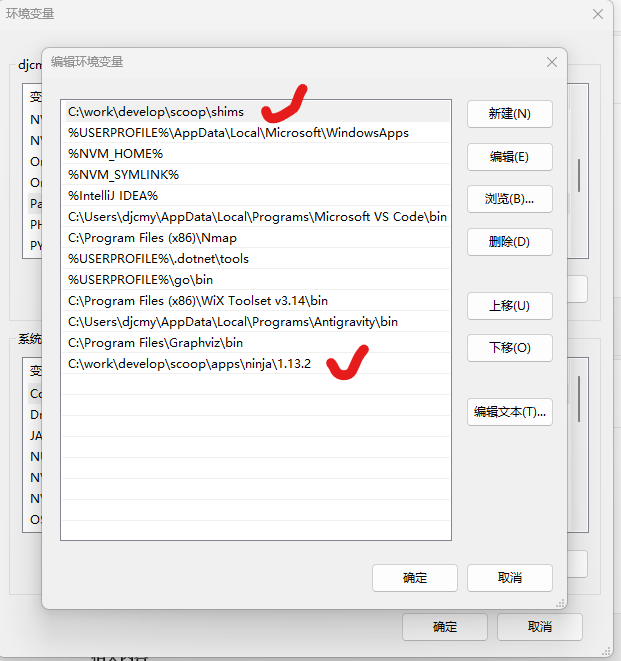
💡 Tip: For convenience later, set C:\work\develop\scoop as the SCOOP environment variable and append C:\work\develop\scoop\shims to the PATH environment variable.

env

env

4.2 Download and Configure vcpkg, Then Install Dependency Libraries

The following installs the required dependency libraries, specifically: openssl and libsrtp. Other optional dependencies (e.g. ffmpeg) should also be installable, though they have not been tested yet.

For detailed vcpkg usage, refer to:

  1. Download vcpkg, which includes various configuration scripts and build scripts for open-source libraries. Assume the download path is C:\work\develop:

    1
    git clone https://github.com/microsoft/vcpkg
  2. Download the pre-built vcpkg package manager tool:

    1
    .\vcpkg\bootstrap-vcpkg.bat -disableMetrics
  3. Build openssl:

    1
    .\vcpkg\vcpkg.exe install --triplet=x64-windows-static openssl
  4. Build libsrtp (requires ENABLE_OPENSSL):

    Edit C:\work\develop\vcpkg\ports\libsrtp\portfile.cmake and update vcpkg_configure_cmake to the following: (Note: the configuration below has been updated to match the current version)

    1
    2
    3
    4
    5
    6
    7
    8
    vcpkg_cmake_configure(
    SOURCE_PATH "${SOURCE_PATH}"
    OPTIONS
    "-DCMAKE_PROJECT_INCLUDE=${CMAKE_CURRENT_LIST_DIR}/cmake-project-include.cmake"
    -DLIBSRTP_TEST_APPS=OFF
    -DENABLE_OPENSSL:BOOL=ON
    ${FEATURE_OPTIONS}
    )
    1. Then build (official method):

      1
      .\vcpkg\vcpkg.exe install --triplet=x64-windows-static libsrtp
    2. Or alternatively (the method I used later):

      1
      .\vcpkg\vcpkg.exe install "libsrtp[openssl]:x64-windows-static"

    Note: I successfully compiled the program using method 1, but later discovered a WebRTC issue. After investigation, it appeared to be a compatibility problem between OpenSSL and libsrtp. I had originally built libsrtp using the official method, and the issue was resolved only after rebuilding libsrtp with the command above.

    1
    2
    3
    # Uninstall first, then reinstall
    .\vcpkg\vcpkg.exe remove libsrtp:x64-windows-static --recurse
    .\vcpkg\vcpkg.exe install "libsrtp[openssl]:x64-windows-static"

5. Compile ZLMediaKit

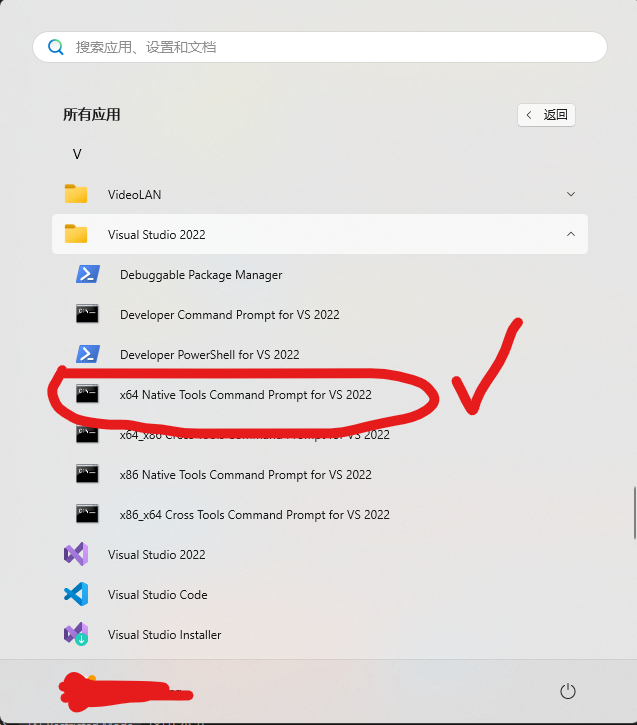
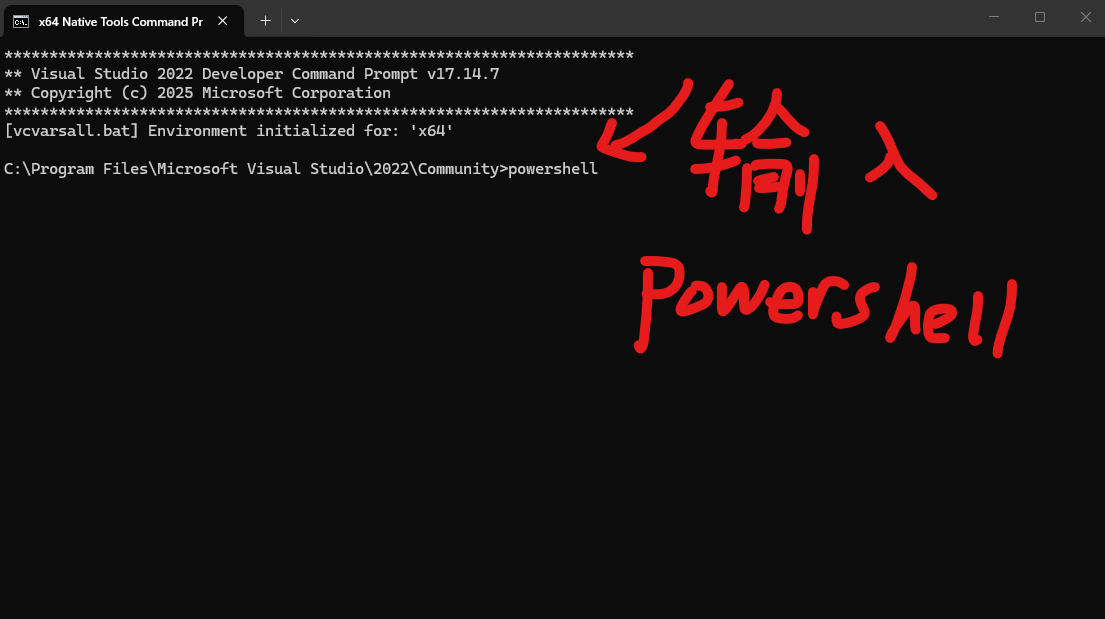
Open the VS2022 developer command prompt from the Start Menu (x64 Native Tools Command Prompt for VS 2022). The PowerShell-based x64 version may not be available by default — you can start with the cmd version and then run powershell to switch to PowerShell.

tools

tools

5.1 Modify CMakeLists.txt

Search for OPENSSL_LIBRARIES in the file and replace the surrounding block with the following:

1
2
3
4
5
6
7
8
9
10
11
12
13
14
15
16
17
18
19
20
21
# Check if openssl is installed
# find openssl installed
find_package(OpenSSL QUIET)
if(OPENSSL_FOUND AND ENABLE_OPENSSL)
message(STATUS "found library: ${OPENSSL_LIBRARIES}, ENABLE_OPENSSL defined")
include_directories(${OPENSSL_INCLUDE_DIR})
update_cached_list(MK_COMPILE_DEFINITIONS ENABLE_OPENSSL)
update_cached_list(MK_LINK_LIBRARIES ${OPENSSL_LIBRARIES})
if(CMAKE_SYSTEM_NAME MATCHES "Linux" AND OPENSSL_USE_STATIC_LIBS)
update_cached_list(MK_LINK_LIBRARIES ${CMAKE_DL_LIBS})
elseif(CMAKE_SYSTEM_NAME MATCHES "Windows")
# On Windows, OpenSSL (especially vcpkg static libs) depends on CryptoAPI
update_cached_list(MK_LINK_LIBRARIES Crypt32)
# WS2_32 is already included in the WIN32 branch below, so this is optional
# update_cached_list(MK_LINK_LIBRARIES ws2_32)
endif()
else()
set(ENABLE_OPENSSL OFF)
set(ENABLE_WEBRTC OFF)
message(WARNING "openssl not found; rtmp will not support flash player, and https/wss/rtsps/rtmps/webrtc will be disabled")
endif()

The key change is to replace the block with the following snippet — leave the rest untouched (the exact location may vary between ZLMediaKit versions, so pay attention to where you apply the change):

1
2
3
4
5
6
7
8
if(CMAKE_SYSTEM_NAME MATCHES "Linux" AND OPENSSL_USE_STATIC_LIBS)
update_cached_list(MK_LINK_LIBRARIES ${CMAKE_DL_LIBS})
elseif(CMAKE_SYSTEM_NAME MATCHES "Windows")
# On Windows, OpenSSL (especially vcpkg static libs) depends on CryptoAPI
update_cached_list(MK_LINK_LIBRARIES Crypt32)
# WS2_32 is already included in the WIN32 branch below, so this is optional
# update_cached_list(MK_LINK_LIBRARIES ws2_32)
endif()

5.2 Run the Build Commands

1
2
3
4
5
6
7
8
9
10
11
12
13
14
15
16
17
18
19
20
21
# Run the following commands from the ZLMediaKit source root directory.
# Make sure you have downloaded the ZLMediaKit source and run: git submodule update --init --recursive
mkdir build
cd build

$VCPKG_CMAKE = 'C:\work\develop\vcpkg\scripts\buildsystems\vcpkg.cmake'
$VCPKG_INSTALL_PATH = 'C:\work\develop\vcpkg\installed\x64-windows-static'

$CMAKE_OPTIONS = @(
"-GCodeBlocks - Ninja"
"-DCMAKE_BUILD_TYPE:STRING=RelWithDebInfo"
"-DCMAKE_C_COMPILER:STRING=cl.exe"
"-DCMAKE_CXX_COMPILER:STRING=cl.exe"
"-DCMAKE_TOOLCHAIN_FILE:FILEPATH=$VCPKG_CMAKE"
"-DCMAKE_PREFIX_PATH:FILEPATH=$VCPKG_INSTALL_PATH"
"-DVCPKG_TARGET_TRIPLET:STRING=x86-windows-static"
"-DENABLE_WEBRTC:BOOL=ON"
)

cmake .. @CMAKE_OPTIONS
cmake --build . --target all

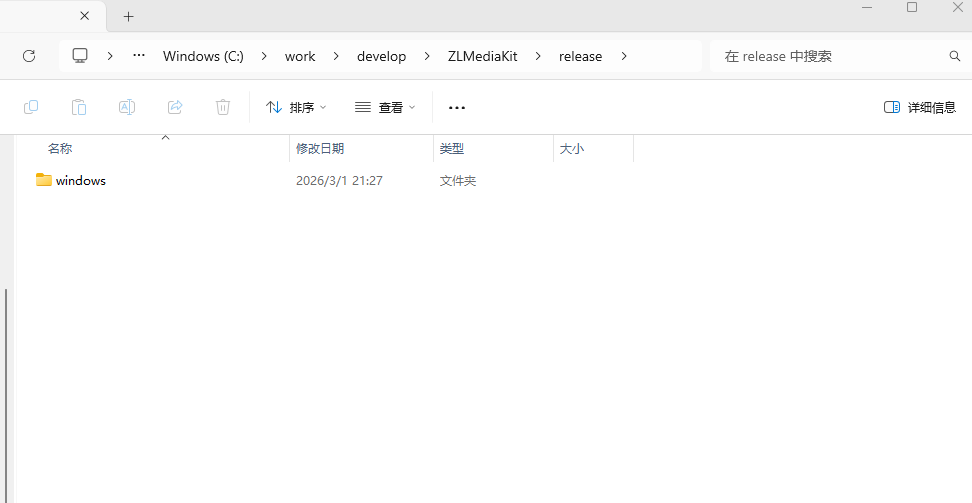
After a successful build, a release directory will appear in the source root containing the compiled binaries.
Release

6. Running

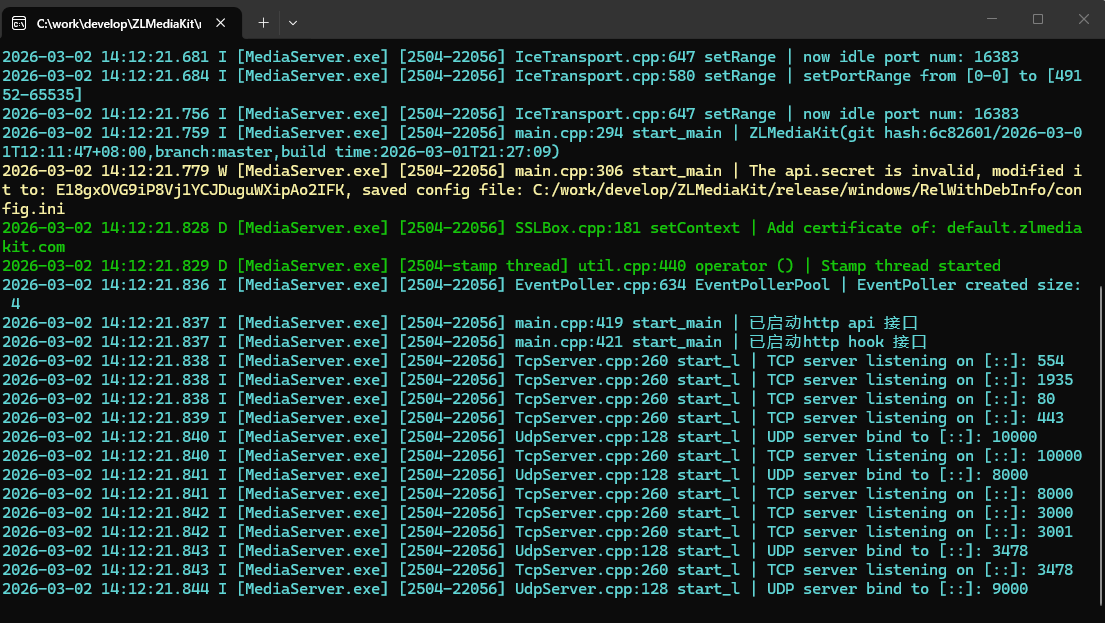
Navigate to C:\work\develop\ZLMediaKit\release\windows\RelWithDebInfo and double-click MediaServer.exe to run it directly.

Run

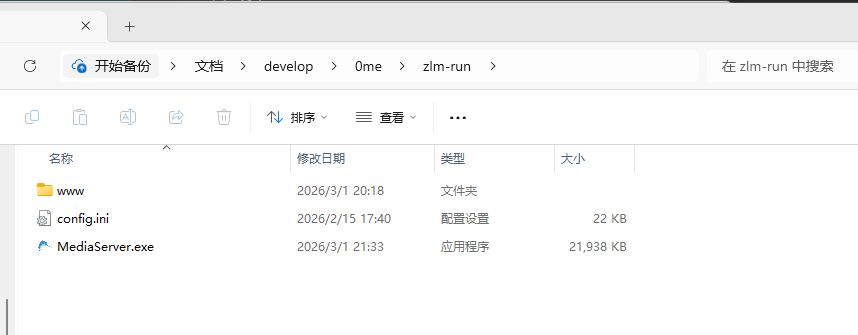
You only need to copy MediaServer.exe, MediaServer.pdb, and the www directory to another location to use the basic functionality.

Release

7. Troubleshooting

Issue 1: WebRTC Shows an OpenSSL Error

Cause: A compatibility issue between OpenSSL and libsrtp. libsrtp needs to be rebuilt.

1
2
3
# Uninstall first, then reinstall
.\vcpkg\vcpkg.exe remove libsrtp:x64-windows-static --recurse
.\vcpkg\vcpkg.exe install "libsrtp[openssl]:x64-windows-static"

Overview

I hadn’t paid much attention to OpenClaw before, mainly because the API consumption is relatively high and costly. This time I received a free Unicom Coding Plan Pro along with a 2-core 4GB cloud server, so I decided to give it a try.
This article first covers how to install OpenClaw on an Ubuntu cloud server. Usage guides and further details will be written when time permits.

  1. OS: Ubuntu 22.04 Server
  2. OpenClaw version: 2026.2.26
  3. Cloud server: 2-core 4GB RAM
  4. User: root

Installation

Install OpenClaw

I am using a cloud server with a clean OS — no software pre-installed.
Installing OpenClaw is actually very simple. Run the following one-liner to install it:

1
curl -fsSL https://openclaw.ai/install.sh | bash

The installation script will automatically install Node, OpenClaw, and other dependencies. Select “Yes” for all prompts in the interface.

After installation, the Gateway will fail to start (don’t worry — once we complete the configuration below, we just need to restart the Gateway). At the end, the following information will appear on the screen:

1
2
3
4
5
6
7
8
9
10
11
12
🦞 OpenClaw 2026.2.26 (bc50708) — Your task has been queued; your dignity has been deprecated.

Dashboard URL: http://127.0.0.1:18789/#token=85xxxxxxxxxxxxd9c6b036328fe00d04fd3c98
Copy to clipboard unavailable.
No GUI detected. Open from your computer:
ssh -N -L 18789:127.0.0.1:18789 root@192.168.0.167
Then open:
http://localhost:18789/
http://localhost:18789/#token=85xxxxxxxxxxxxd9c6b036328fe00d04fd3c98
Docs:
https://docs.openclaw.ai/gateway/remote
https://docs.openclaw.ai/web/control-ui

At this point, you cannot access http://localhost:18789/#token=85xxxxxxxxxxxxd9c6b036328fe00d04fd3c98 normally.

No worries — just follow the configuration steps below.

Installation screen 1

Installation screen 2

Install Nginx (Skip this step if you are only using it locally with a GUI)

Run the following command:

1
apt install -y nginx

If a selection prompt appears, simply confirm and proceed.

Navigate to /etc/nginx/, find the nginx.conf file, and update it as follows:

1
2
3
4
5
6
7
8
9
10
11
12
13
14
15
16
17
18
19
20
21
22
23
24
25
26
27
28
29
30
31
32
33
34
35
36
37
38
39
40
41
42
43
44
45
46
47
48
49
50
51
52
53
54
55
56
57
58
59
60
61
62
63
64
65
66
67
68
69
70
71
72
73
74
75
76
77
78
79
80
81
82
83
84
85
86
87
88
89
90
91
92
93
94
95
96
user www-data;
worker_processes auto;
pid /run/nginx.pid;
include /etc/nginx/modules-enabled/*.conf;

events {
worker_connections 768;
# multi_accept on;
}

http {

##
# Basic Settings
##

sendfile on;
tcp_nopush on;
types_hash_max_size 2048;
server_tokens off;

# server_names_hash_bucket_size 64;
# server_name_in_redirect off;

include /etc/nginx/mime.types;
default_type application/octet-stream;

##
# SSL Settings
##

ssl_protocols TLSv1 TLSv1.1 TLSv1.2 TLSv1.3; # Dropping SSLv3, ref: POODLE
ssl_prefer_server_ciphers on;

##
# Logging Settings
##

access_log /var/log/nginx/access.log;
error_log /var/log/nginx/error.log;

##
# Gzip Settings
##

gzip on;

# gzip_vary on;
# gzip_proxied any;
# gzip_comp_level 6;
# gzip_buffers 16 8k;
# gzip_http_version 1.1;
# gzip_types text/plain text/css application/json application/javascript text/xml application/xml application/xml+rss text/javascript;

##
# Virtual Host Configs
##

include /etc/nginx/conf.d/*.conf;
include /etc/nginx/sites-enabled/*;

server {
listen 18790;
server_name your-domain.com; # Replace with your domain name or IP

location / {
proxy_pass http://127.0.0.1:18789;

# Required header forwarding
proxy_set_header Host $host;
proxy_set_header X-Real-IP $remote_addr;
proxy_set_header X-Forwarded-For $proxy_add_x_forwarded_for;
proxy_set_header X-Forwarded-Proto $scheme;

# WebSocket support (if OpenClaw uses WS)
proxy_http_version 1.1;
proxy_set_header Upgrade $http_upgrade;
proxy_set_header Connection "upgrade";

# Timeout and buffer optimization (optional)
proxy_connect_timeout 60s;
proxy_send_timeout 60s;
proxy_read_timeout 60s;
proxy_buffering on;
proxy_buffer_size 4k;
proxy_buffers 8 4k;
}

# Health check endpoint (optional)
location /health {
access_log off;
proxy_pass http://127.0.0.1:18789/health;
}
}
}

Save the file and run the following command:

1
nginx -s reload

Start the Gateway

Run the following commands:

1
2
openclaw config set gateway.mode local
openclaw gateway restart

local

If the console shows no failure messages, the Gateway has started successfully. After configuring the firewall, you can access the UI in your browser, for example: http://:18790/#token=85xxxxxxxxxxxxd9c6b036328fe00d04fd3c98

At this point the UI may still show some errors — proceed to the next step.

Configure OpenClaw

Once you can access the UI, it is still not usable yet — you need to modify the OpenClaw configuration file located in the /root/.openclaw directory.

Below I provide the complete configuration that you can use directly. Replace the token, allowedOrigins, apiKey, and other values with your own settings. I am using the free Unicom Coding Plan.

1
2
3
4
5
6
7
8
9
10
11
12
13
14
15
16
17
18
19
20
21
22
23
24
25
26
27
28
29
30
31
32
33
34
35
36
37
38
39
40
41
42
43
44
45
46
47
48
49
50
51
52
53
54
55
56
57
58
59
60
61
62
63
64
65
66
67
68
69
70
71
72
73
74
75
76
77
78
79
80
81
82
83
84
85
86
{
"meta": {
"lastTouchedVersion": "2026.2.26",
"lastTouchedAt": "2026-02-28T13:04:18.321Z"
},
"wizard": {
"lastRunAt": "2026-02-28T11:48:10.150Z",
"lastRunVersion": "2026.2.26",
"lastRunCommand": "doctor",
"lastRunMode": "local"
},
"agents": {
"defaults": {
"compaction": {
"mode": "safeguard"
},
"maxConcurrent": 4,
"subagents": {
"maxConcurrent": 8
},
"model": {
"primary": "Unicom/MiniMax-M2.5"
},
"models": {
"Unicom/MiniMax-M2.5": {}
}
}
},
"messages": {
"ackReactionScope": "group-mentions"
},
"commands": {
"native": "auto",
"nativeSkills": "auto",
"restart": true,
"ownerDisplay": "raw"
},
"gateway": {
"mode": "local",
"auth": {
"mode": "token",
"token": "Keep the original Token"
},
"controlUi": {
"allowedOrigins": [
"http://60.13.54.190:18790",
"http://192.168.0.167:18790",
"http://192.168.0.167:18789",
"http://127.0.0.1:18789"
],
"allowInsecureAuth": true,
"dangerouslyDisableDeviceAuth": true
}
},
"models": {
"mode": "merge",
"providers": {
"Unicom": {
"baseUrl": "https://aigw-gzgy2.cucloud.cn:8443/v1",
"apiKey": "sk-sp-xxxxxxxxxxxxxxxxxxxxxxxxxxx",
"api": "openai-completions",
"models": [
{
"id": "MiniMax-M2.5",
"name": "MiniMax-M2.5",
"reasoning": false,
"input": ["text"],
"cost": { "input": 0, "output": 0, "cacheRead": 0, "cacheWrite": 0 },
"contextWindow": 128000,
"maxTokens": 32000
},
{
"id": "Qwen3.5-397B-A17B",
"name": "Qwen3.5-397B-A17B",
"reasoning": false,
"input": ["text"],
"cost": { "input": 0, "output": 0, "cacheRead": 0, "cacheWrite": 0 },
"contextWindow": 128000,
"maxTokens": 32000
}
]
}
}
}
}

After making your edits, first back up the original openclaw.json file, then replace it with the updated file and restart the Gateway:

1
openclaw gateway restart

Once started successfully, you can access the UI in your browser, for example: http://:18790/#token=85xxxxxxxxxxxxd9c6b036328fe00d04fd3c98

Everything should now be working correctly in the UI!

UI

Troubleshooting

Issue 1: Gateway start blocked: set gateway.mode=local (current: unset) or pass –allow-unconfigured

Solution:

1
2
openclaw config set gateway.mode local
openclaw gateway restart

Issue 2: origin not allowed (open the Control UI from the gateway host or allow it in gateway.controlUi.allowedOrigins)

Solution:
Modify the "gateway" section in openclaw.json, add the "controlUi" block, and restart the Gateway:

1
2
3
4
5
6
7
8
9
10
11
12
13
14
15
16
17
"gateway": {
"mode": "local",
"auth": {
"mode": "token",
"token": "85xxxxxxxxd95d0d9c6b0xxxxxxxx04fd3c98"
},
"controlUi": {
"allowedOrigins": [
"http://60.13.54.190:18790",
"http://192.168.0.167:18790",
"http://192.168.0.167:18789",
"http://127.0.0.1:18789"
],
"allowInsecureAuth": true,
"dangerouslyDisableDeviceAuth": true
}
}

之前做了一个 GB28181的轻量平台,但是要想安装程序需要一点容器之类的操作经验,在使用上确实有点不太方便。因此我就想着把程序做成用户双击 直接使用的模式。 为了实现这个目的,需要在 windows 上编译 zlmediakit。
本文档介绍如何在 Windows 11 环境下编译 ZLMediaKit。
由于在按照官方教程编译时出现了几个错误,并且文档有些地方写的不清不楚的,我觉得有必要更新写一篇文档补充下。
请跟随步骤一步一步操作。

1. 环境准备

在开始编译之前,请确保你的开发环境已安装以下软件:

  • Visual Studio: VS2022(需安装 C++ 桌面开发组件)。
  • Git: 用于克隆代码仓库。

我进行编译时使用的是 Windows11系统,VS2022。 编译过程中无需打开 vs2022。只要 powershell 以及 x64 Native Tools Command Prompt for VS 2022。

2. 获取代码

打开命令行工具(CMD 或 PowerShell),执行以下命令克隆代码并初始化子模块:

1
2
3
4
5
6
7
8
# 克隆主仓库
git clone https://github.com/ZLMediaKit/ZLMediaKit.git

# 进入目录
cd ZLMediaKit

# 初始化子模块 (重要,否则编译会失败)
git submodule update --init --recursive

我当前编译的是 2026/3/1 日的最新 master 分支代码。


3、基于 scoop + vcpkg 的 Windows 版编译

注意: 以下是 zlmediakit 官网关于 windows编译的内容,我对其中进行了部分修改保证编译能成功。

以下为基于 scoop + vcpkg 编译 ZLMediaKit 的一种方式。

  • scoop: Windows 命令行下使用的软件包安装管理工具
  • vcpkg: 微软发起的 C++ 库管理器,其中有大量常用开源库

由于可以在命令行下使用,可以非常方便的进行自动化集成,推荐大家试用。

⚠️ 注意

  • 以下所有操作如无特殊说明均需在 PowerShell 命令行下进行

4、基于 scoop 及 vcpkg 安装编译依赖

4.1 下载安装 scoop 并使用 scoop 安装依赖工具

说明: 直接在 powershell 中执行下面的命令即可,该步骤中很少出错。

以下是为了安装依赖工具 cmakeninja(可选,但建议安装),如已安装,可跳过。

具体可参考其官网说明,以下仅列出相关简要步骤:

  1. **设置环境变量 SCOOP**,用于配置 scoop 的下载安装目录(包括其管理的软件包):

    1
    $env:SCOOP = 'C:\work\develop\scoop'
  2. 为当前用户设置允许执行 PowerShell 脚本:

    1
    Set-ExecutionPolicy -ExecutionPolicy RemoteSigned -Scope CurrentUser
  3. 安装 scoop:

    1
    iwr -useb get.scoop.sh | iex
  4. scoop 添加 extras 软件仓库:

    1
    scoop bucket add extras
  5. 安装 cmakeninja:

    1
    scoop install cmake ninja

💡 提示:为方便后续使用,需将 C:\work\develop\scoop 设置到环境变量 SCOOP 中,将 C:\work\develop\scoop\shims 追加到环境变量 PATH 中。

env

env

4.2 下载配置 vcpkg 并使用 vcpkg 安装依赖库

以下是为了安装相关依赖库,具体包括:openssl 以及 libsrtp,其他可选依赖(如:ffmpeg)也应可安装,暂未测试。

vcpkg 具体使用可参考:

  1. **下载 vcpkg**,其中包括各种配置脚本以及开源库的编译脚本,下载路径假设为 C:\work\develop:

    1
    git clone https://github.com/microsoft/vcpkg
  2. 下载预编译的 vcpkg 包管理工具:

    1
    .\vcpkg\bootstrap-vcpkg.bat -disableMetrics
  3. 编译 openssl:

    1
    .\vcpkg\vcpkg.exe install --triplet=x64-windows-static openssl
  4. **编译 libsrtp**(需要 ENABLE_OPENSSL):

    编辑 C:\work\develop\vcpkg\ports\libsrtp\portfile.cmake,修改 vcpkg_configure_cmake 为如下:(注意 下面配置修改成了当前版本的内容)

    1
    2
    3
    4
    5
    6
    7
    8
    vcpkg_cmake_configure(
    SOURCE_PATH "${SOURCE_PATH}"
    OPTIONS
    "-DCMAKE_PROJECT_INCLUDE=${CMAKE_CURRENT_LIST_DIR}/cmake-project-include.cmake"
    -DLIBSRTP_TEST_APPS=OFF
    -DENABLE_OPENSSL:BOOL=ON
    ${FEATURE_OPTIONS}
    )
    1. 然后进行编译(官方方法):

      1
      .\vcpkg\vcpkg.exe install --triplet=x64-windows-static libsrtp
    2. 或者 (后期我使用的方法)

      1
      .\vcpkg\vcpkg.exe install "libsrtp[openssl]:x64-windows-static"

    说明 : 我成功使用 1 步骤编译了 程序,但是程序在后面的使用中发现 webrtc 有问题,最后查找原因发现可能是 openssl 同 libsrtp 兼容的问题。我先是用的官方方法编译的 libsrtp ,后面使用上面的命令重新编译了 libsrtp 才正常。

    1
    2
    3
    # 先卸载,再重新安装
    .\vcpkg\vcpkg.exe remove libsrtp:x64-windows-static --recurse
    .\vcpkg\vcpkg.exe install "libsrtp[openssl]:x64-windows-static"

5、编译 ZLMediaKit

从开始菜单中打开 VS2022 的开发者命令行模式(x64 Native Tools Command Prompt for VS 2022)。默认未找到基于 PowerShell 的 x64 位版本,可先使用 cmd 版本,然后执行 powershell 切换到 PowerShell。

tools

tools

5.1 修改 CMakeLists.txt

在文件里搜索: OPENSSL_LIBRARIES ,将内容修改成下面的内容:

1
2
3
4
5
6
7
8
9
10
11
12
13
14
15
16
17
18
19
20
21
# 查找 openssl 是否安装
# find openssl installed
find_package(OpenSSL QUIET)
if(OPENSSL_FOUND AND ENABLE_OPENSSL)
message(STATUS "found library: ${OPENSSL_LIBRARIES}, ENABLE_OPENSSL defined")
include_directories(${OPENSSL_INCLUDE_DIR})
update_cached_list(MK_COMPILE_DEFINITIONS ENABLE_OPENSSL)
update_cached_list(MK_LINK_LIBRARIES ${OPENSSL_LIBRARIES})
if(CMAKE_SYSTEM_NAME MATCHES "Linux" AND OPENSSL_USE_STATIC_LIBS)
update_cached_list(MK_LINK_LIBRARIES ${CMAKE_DL_LIBS})
elseif(CMAKE_SYSTEM_NAME MATCHES "Windows")
# Windows 下 OpenSSL(尤其是 vcpkg 静态库)会依赖 CryptoAPI
update_cached_list(MK_LINK_LIBRARIES Crypt32)
# 下面 WIN32 分支里已经有 WS2_32,这里不加也行
# update_cached_list(MK_LINK_LIBRARIES ws2_32)
endif()
else()
set(ENABLE_OPENSSL OFF)
set(ENABLE_WEBRTC OFF)
message(WARNING "openssl 未找到, rtmp 将不支持 flash 播放器, https/wss/rtsps/rtmps/webrtc 也将失效")
endif()

主要是替换成下面的脚本,其它不动(每个zlm版本可能都不太一样,需要注意修改的地方):

1
2
3
4
5
6
7
8
if(CMAKE_SYSTEM_NAME MATCHES "Linux" AND OPENSSL_USE_STATIC_LIBS)
update_cached_list(MK_LINK_LIBRARIES ${CMAKE_DL_LIBS})
elseif(CMAKE_SYSTEM_NAME MATCHES "Windows")
# Windows 下 OpenSSL(尤其是 vcpkg 静态库)会依赖 CryptoAPI
update_cached_list(MK_LINK_LIBRARIES Crypt32)
# 下面 WIN32 分支里已经有 WS2_32,这里不加也行
# update_cached_list(MK_LINK_LIBRARIES ws2_32)
endif()

5.1 执行编译命令

1
2
3
4
5
6
7
8
9
10
11
12
13
14
15
16
17
18
19
20
# 在zlmediakit 源码根目录下执行下面的命令。执行前请确保下载了 zlm 的源码,并且执行了 git submodule update --init --recursive
mkdir build
cd build

$VCPKG_CMAKE = 'C:\work\develop\vcpkg\scripts\buildsystems\vcpkg.cmake'
$VCPKG_INSTALL_PATH = 'C:\work\develop\vcpkg\installed\x64-windows-static'

$CMAKE_OPTIONS = @(
"-GCodeBlocks - Ninja"
"-DCMAKE_BUILD_TYPE:STRING=RelWithDebInfo"
"-DCMAKE_C_COMPILER:STRING=cl.exe"
"-DCMAKE_CXX_COMPILER:STRING=cl.exe"
"-DCMAKE_TOOLCHAIN_FILE:FILEPATH=$VCPKG_CMAKE"
"-DCMAKE_PREFIX_PATH:FILEPATH=$VCPKG_INSTALL_PATH"
"-DVCPKG_TARGET_TRIPLET:STRING=x86-windows-static"
"-DENABLE_WEBRTC:BOOL=ON"
)

cmake .. @CMAKE_OPTIONS
cmake --build . --target all

编译成功后,源码目录下多一个 release 目录,编译的程序在里面。
发布

6、运行

C:\work\develop\ZLMediaKit\release\windows\RelWithDebInfo 目录直接双击运行 MediaServer.exe 即可。

运行

只要复制 MediaServer.exe , MediaServer.exe , www目录,到其它位置,就可以使用基本的功能。

发布

7、问题

问题1:webrtc 显示 openssl 问题

原因:openssl 与 libsrtp 兼容有问题,需要重新编译libsrtp。

1
2
3
# 先卸载,再重新安装
.\vcpkg\vcpkg.exe remove libsrtp:x64-windows-static --recurse
.\vcpkg\vcpkg.exe install "libsrtp[openssl]:x64-windows-static"
0%